Pages

Monday, August 4, 2014

Mini Retreat and Progress on Celtic Solstice

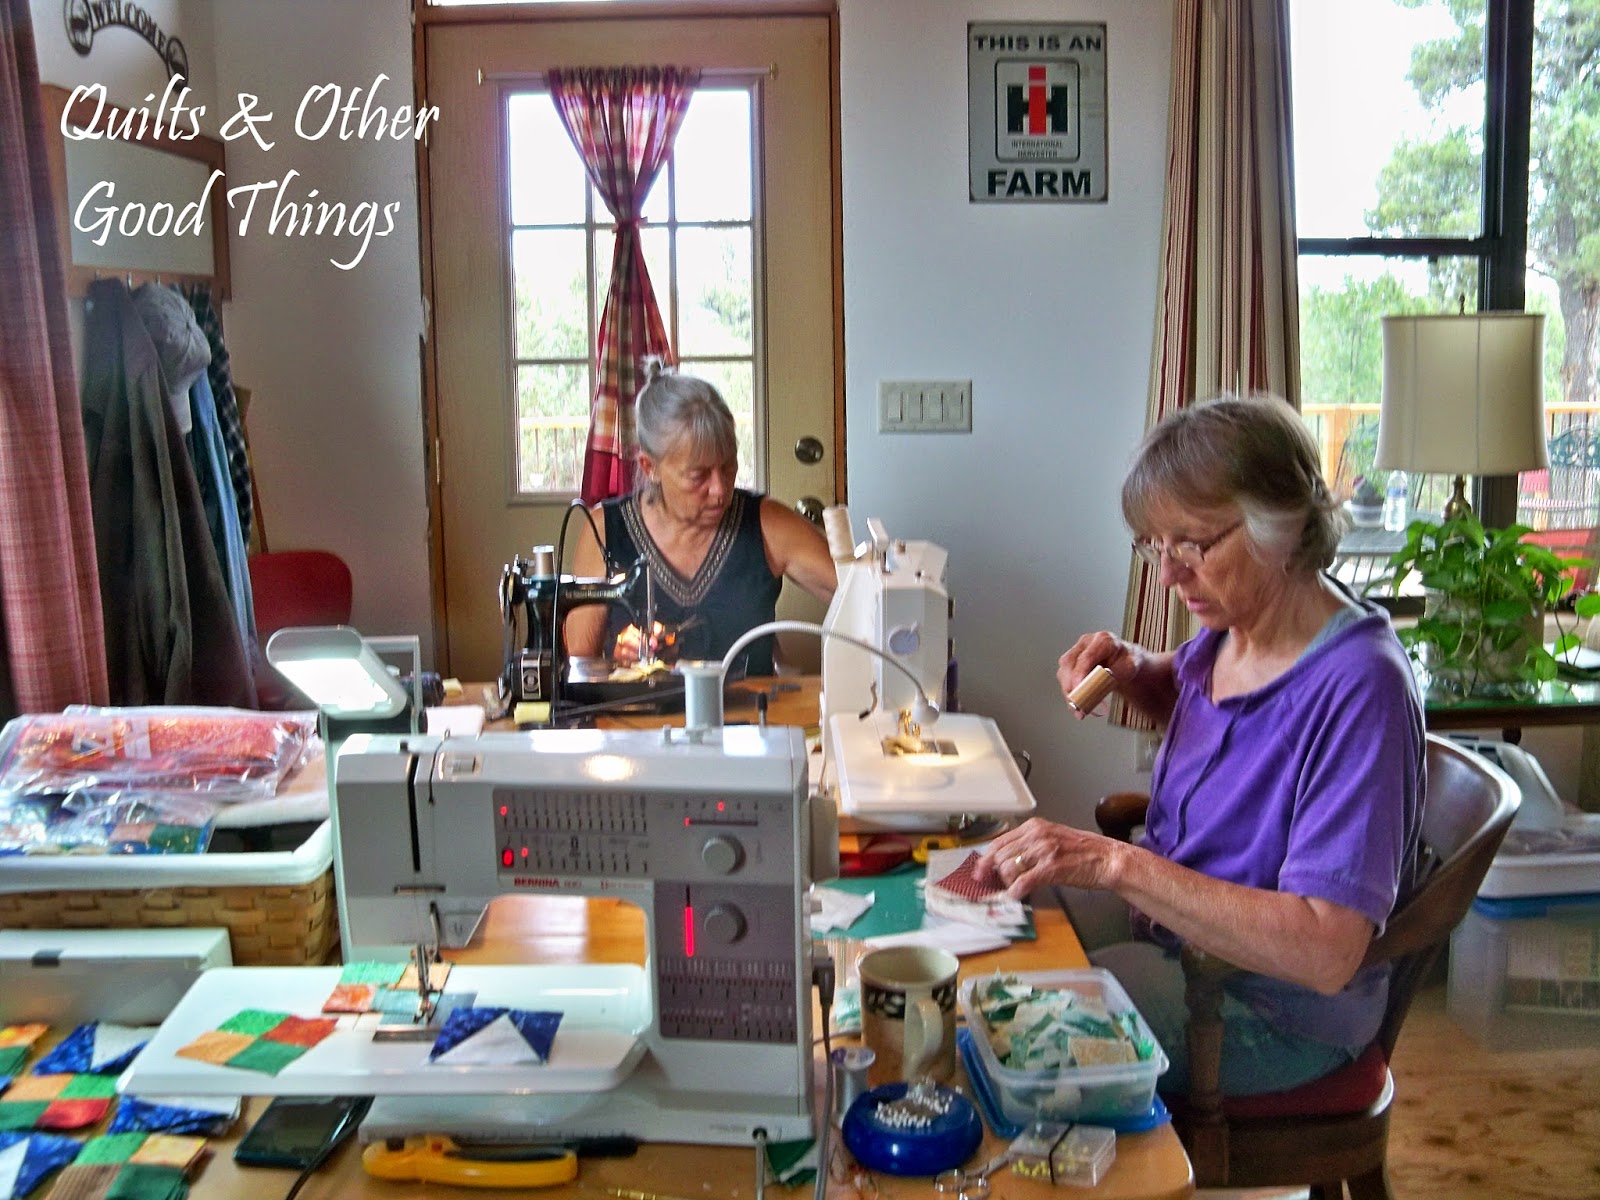
It took a bit of planning, but a couple of weeks ago, friends Diane, Joyce and I got together at Joyce's cottage for a mini retreat.  Coordinating schedules can be hard!  But, Diane and I finally got to escape the heat of the valley to go up to see Joyce for a couple of days in the cool mountains!

Here is the view from the deck early in the morning.  Can you believe we did not sleep past 6 AM any of the days?


In no time, we had our machines set up and were sewing!


It is a good thing we went when we did.  Last week Diane took a bad fall on her roller blades and has several breaks in her right hand and fingers plus scrapes and bruises on the rest of her right side! It will be a while before she will be able to do much sewing!


Diane was paper piecing the blocks for a flying geese quilt.  It is going to be stunning!


Joyce was stitching corners on units for a quilt with some bow tie units as her "leaders and enders".


I was finally putting together the units for the star blocks of the Celtic Solstice quilt a Bonnie Hunter mystery quilt started last November.

We all made quite a bit of progress in addition to laughing, talking, eating and just enjoying being together.  We are planning to something special for our 30th Friendiversary in 2016.  We met in 1986 when we all joined the same chapter of the Arizona Quilters Guild and became fast friends.

Since our mini retreat, I've made a bit of progress on the Celtic Solstice quilt blocks.


All 40 of the star blocks are completed.


The star blocks alternate with blocks that have a pin wheel in the center.  Two are shown above.  Now all I have to do is make 39 more of those blocks, stitch the pieced border and add two more borders.  Yeah, it will be a while before the top is finished, but progress is being made.

So what are you working on?

Until next time.......

xoxoXOXOxoxo

Lois


Monday, July 14, 2014

Celtic Solstice Parts and Pieces

Have you ever participated in a mystery quilt?  I had not until last November when Bonnie Hunter posted her Celtic Solstice Mystery Quilt.  I liked the colors, but at the time had no idea what the quilt would look like.  And so I began collecting stash fabrics and purchasing a few to fill in.

Once the clues started being posted, I cut some of each clue each week.  This was happening between Thanksgiving and Christmas, folks!  Too busy to make a lot of each, I just made a few.

My project lately has been to finish all the parts and pieces.  Here they are grouped in bundles of 10.


This sure doesn't look like a queen sized quilt, does it?  But it is!   All but the borders are here!  Well, actually one border is here.  The blue and orange units on the upper left are a pieced border yet to be assembled.


These are the two blocks that will be alternated in the rows.

While Bonnie gave the instructions and number of pieces for two sizes, one was just 75 x 75 inches and the other was a whopping 111 x 111 in. king sized quilt!

Enter Electric Quilt to figure out a Queen Size!


I also took liberties with the color of the outside border and the placement of the orange and blue pieced border.  Of course, this could change - it's not done until it's pieced!

I think I'm going to love it.  Thank you Bonnie Hunter at Quiltville!  If you have not been to Bonnie's blog, jump on over there - she has a ton of good information and is an avid scrap quilter!

Next week, friend Diane and I will travel to our friend Joyce's cottage for a mini quilt retreat.  These parts and pieces will be going with me and there will be a lot of sewing going on!  Three friends, lots of scraps and parts and pieces, laughter, fun and food!

I'll report back to let you know the progress of my queen sized Celtic Solstice!

Until next time,

xoxoXOXOxoxo

Lois


Monday, June 23, 2014

Random Things

Lately, I've been doing random things.  You know a little of this and a little of that, but nothing really big completed.  Well, unless you count our VBS where we had over 450 kids and 250+ volunteers during the 4 day event.  That is a 4 day event that takes about a year to plan.  We've already started on next year!

In the meantime, at home I've just done a few little creative things.  Like my summer "beachy" door wreath.


 This wreath was inspired by Confessions of a Plate Addict a few weeks ago.  Fortunately, I already had the wreath base.  All it needed was a little white spray paint.  The shells came from my favorite "beach" at Hobby Lobby.  Friends had given me a gift card back in February which I had only used once for a small purchase.  A big bag of shells was just what I needed.  There are a few smaller shells that I already had on hand.  My front door is the perfect color, don't you think?


The shells are simply hot-glued on the base wreath.

A while back, Pottery Barn had a pillow I loved that had the word "Inspired" on it plus the definition.  For some reason, the word empowered kept coming up and it seemed appropriate to use that word to make my own version of the pillow.


The lettering was created in Adobe Illustrator and printed (reversed) onto Avery  Light Fabric Transfer paper.  I do cut very closely to the lettering as there is a little bit of a residue that shows through and I mostly want to see the print.  


In the loft is a built in that has family photos both on it and above it.  I try to have a little seasonal display there as well.  This one done for Memorial Day will work through July 4.


This is still a work in progress.  The fabric on the chairs of our patio furniture needs to be replaced every couple of years or so.  The chair on the right has the old ticking fabric and it's been on way longer than it should have been.  It has faded and rotted from the sun and from being wet when the Monsoons blow rain sideways onto the patio.  The new fabric (on the left) is a bit larger stripe and also has more shades of blue than the previous fabric.  Two are done and three more are cut, but not stitched.  These are simply stapled to the pressed board base and put in the chair base. 

Originally the chairs and table were yellow.  The fabric on the chairs was yellow and orange floral.  Next came white spray painted chairs and table with a Provencal print in blue and cream.  After that was green paint and a green and pink floral print.  There were probably other fabrics that I've forgotten before the blue ticking and return to white paint.  No worries, in a few years, these will be replaced again and all will look fresh and new again!


This little bench is both an old project and a new one.  It was made in the late 80's or early 90's for use in our "Wee Worship" program at church while I was Children's Director before.  Every year a dear sweet couple from North Dakota would come to AZ for the winter.  Almost every year, I would ask Pete to make one more bench as the group was bigger every year.

The benches have been retired and the Bjornstad's no longer come to AZ, but the memories of this sweet couple live on.  I recently was able to obtain one of the retired benches and it holds fond memories of the darling little children, now grown, who used to sit and sing on these cute little benches.  A coat of paint and perhaps a French advertising sign are in it's future.

So there you have it.  All those random little projects that take up my spare time.  Well, these and the quilts I'm still working on, but those are for another post.

Hoping you are having a sensational Summer!

xoxoXOXOxoxo

Lois


Monday, May 19, 2014

Easy Peasy DIY Cutting Table

A long time ago, I promised to show you my easy, peasy DIY cutting table.  It began life as an 8 foot pressed board banquet table.  You know the kind they used to make before using the molded plastic tops.  This one had an ugly wood grained contact paper surface -- nothing to look at, but great for adding extra tables when entertaining. Since it was always covered with a table cloth, the top didn't really matter.

Then one day after many uses, one of the legs broke.  Inspiration hit and the table legs were removed.  It would make a perfect desk for our computer with lots of extra space for other projects.  That first transformation included adding camel colored faux leather to the top wrapping it over the sides and adding leopard print ribbon to the edges with hammered brass upholstery tacks.  The table top set on two short bookcases and was the perfect height for that use.  And then we moved to another state and our needs changed.


We purchased a desk for the computer because I now needed a cutting table as the previous house had a perfect counter in the kitchen where I had been doing my rotary cutting. The new kitchen did not have an island or even a peninsula counter to use and it was too far from the studio anyway.

One day while browsing in Lowe's, I spotted some pipes intended for plumbing and knew they would make the perfect legs for a cutting table that would be the correct height for my 5'7" tall body.

So, here is how we made that former banquet table/desk into a cutting table.

The top had already been covered with the faux leather by taking it outside and using spray adhesive for the top and a staple gun to wrap it down the sides of the top. This also made a nice smooth top to use when designing with large sheets of paper.


The legs had already been removed as you can see by the lighter colored area on the bottom of the table top.


We attached flanges to the four corners of the table and the pipes were screwed into these. Make sure you have the right length of screw for this.  We used just slightly too long of ones and they poked through making slight bumps on top of the table.  Since they are not where I normally cut, I just left them as the bumps did not get in my way, but we really should have purchased shorter ones and replaced them.


Metal caps were attached to the bottom of each pipe so as not to ruin the carpet.


We repeated that four times making a very stable base for the cutting table.


The skirt is extra wide quilt backing fabric hemmed and stitched to shirring tape.  I made two panels so the curtains can be opened from the center front and back of the table. When I first attached the skirt, I used the same upholstery tacks as I had used before.  Then we moved across country again!


Since the skirt was taken off to move, all those tacks were taken out and I decided to do something different to attach it this time.  At first I used self adhesive Velcro tape on the edge of the table - the hook portion - but have found that it comes loose every Summer when my studio gets warm, so I recently stapled it all the way around so as not to have to keep pressing the Velcro back in place.


I stitched the loop part of the Velcro tape over the shirring tape used to gather the skirt. This makes the skirt easy to removed for cleaning when necessary.

The mismatched file cabinets stored beneath the skirt as well as all of the computer and design paper are completely hidden when the skirt is in place.


Though the file cabinets are completely functional, they are NOT pretty, so they need to be hidden!


So there you have it -- an easy DIY project that is practical and with the toile print gathered skirt feminine as well.  The skirt could be changed very easily to a more tailored look by putting pleats on the corners and using a solid fabric if that is more your taste.

By the way, this is the same toile print I used to make ironing board covers for my big board ironing board that I showed you here.  Hope you have enjoyed hearing about this DIY project.  If you don't happen to have a broken banquet table, you could use a piece of pressed board or a smooth hollow core door for the base or even plywood that is fairly thick.

Until Next Time,

xoxoXOXOxoxo

Lois


Saturday, February 15, 2014

Problem Solved!

Yesterday, I was very frustrated with Blogger as I was unable to post photos for you to see. As it turns out, it was only partially a Blogger problem.  Apparently Internet Explorer is no long supported by Blogger (which is the format my blog is posted in) so I was not the only one having issues.

Today, I learned that by using Google Chrome, I can post the photos I intended yesterday.


A giant Love on top of the armoire for all!

The "L" and "E" I had used during the holidays to proclaim NOEL.  Of course the wreath is the "O" All I needed to do was by a "V" and paint it to celebrate two holidays!

I have had a love affair with printed words as long as I can remember.  I found the two prints below as "free" printables on the Internet -- probably, but not necessarily through Pinterest.


Scrabble doesn't have punctuation, so pretend there is the proper accent mark on the t'aime of Je t'aime, French for I Love You.  The hearts on the candle were cut out and then pressed onto the candle.

Though I'm late for Valentine's Day due to the Blogger/Internet Explorer issue, my wishes for you are that you have many in your life who love and appreciate you!

Have a glorious Saturday! I'll be back soon!

xoxoXOXOxoxo

Lois

Friday, February 14, 2014

All You Need Is Love

Valentine Greetings, friends!


Just a quick note to let you know I have not forgotten you!  I don't do a lot of decorating for Valentine's Day, but did do a couple of things that I can share with you.


Apparently the photo part of Blogger is not working for me today.  I've tried from my own pictures file and I've taken the photos into Picasa to try from there and Blogger will not let me upload photos today.


I do want to wish you all a very Happy Valentine's Day.  I'll be back as soon as I can figure out this photo thing.  Help me Blogger!


xoxoXOXOxoxo

Lois